Please read all instructions prior to use!
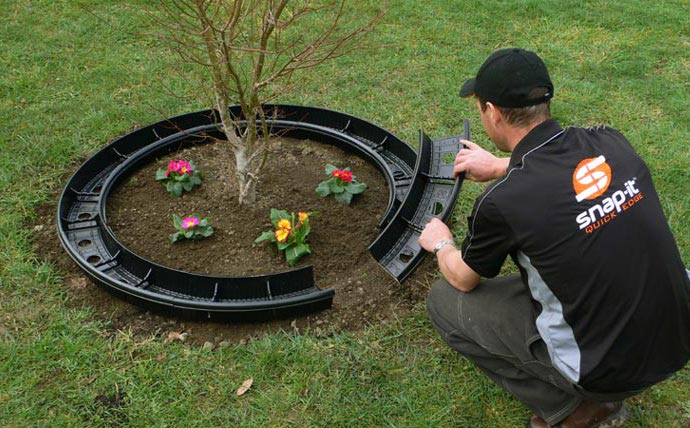
Dig shallow trench for in-ground applications or install on top of ground.
NOTE: Snap-It Quick Edge can also be used up against walls and fences for mowing strips. Simply cut away one of the top edges and place up against the wall etc.
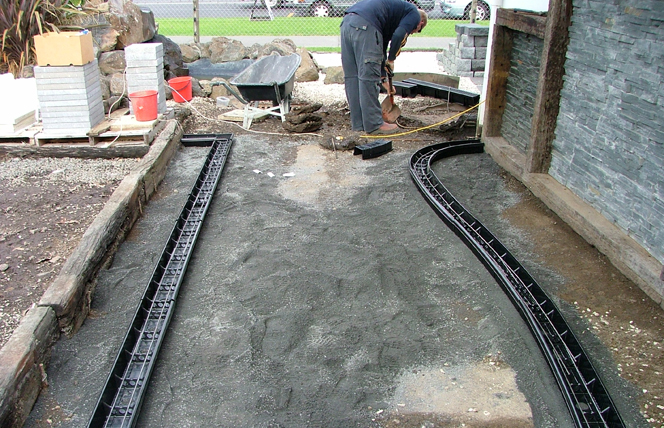
IMPORTANT: Steel reinforcing is necessary! Install reinforcing rods horizontally on top of the cross members to ensure maximum strength and overlap each length by 100mm minimum. Steel may need bending to fit curves etc.
NOTE: A minimum of 1x 6mm rod is recommended and may be upgraded for heavy duty areas. 2 x rods in parallel may be used for heavy duty areas. "Lockpins" should be used to hold steel & plastic in place prior to pouring concrete. Simply install the pins over the steel rods and into the floor of the product.
Gently spade into Snap-It concrete of your choice. (Concrete should be relatively wet to ensure that it flows completely into mouldings). Tap sides to settle.
Ideal concrete mix (Bulk) = 2 parts 10mm aggregate (no fines), 2 parts sand and 1 part cement + water to mix.
For small jobs, 1 x 40KG bag of instant concrete will make approx 2.1 metres of edging.
After approximately 30 minutes the concrete surface should be slightly set. Select your desired finish by using a trowel, brush or imprint roller.
NOTE: Roller imprinted finish must be applied over cling film to prevent cement sticking to roller.
Enjoy your new edging!
Flat Rate Shipping
North Island $40
South Island $68
Spend $800 for Free Shipping
within New Zealand
Classique Plastics Ltd © 2024